Out of Town to Watch the Firebirds
I went out of town to watch the Firebirds play today and it was a great time. The 2+ hour trip down was mostly uneventful, but we did have to avoid some traffic going through some backroads that none of us had ever taken before. I think one of the best things about going out of town to a city is being able to park my car at the hotel and then NEVER have to drive it again until we leave.
The arena was close enough that we were able to use a combination of public transit and walking, which made the whole experience just so nice.
I have to say that the Pechanga Arena is a really nice place to watch a hockey game.
Something that I've noticed is that Acrisure is really cold when compared to other arenas1. I've been to two other arenas and in both of them I felt over dressed and was a bit warm.
Anyway, the game was much closer than it needed to be, but the Firebirds were victorious 6-5 and ended a 7-game win streak for the Gulls.
All in all a very nice way to spend an evening.
- Toyota Arena in Ontario, Pechange Arena in San Diego ↩︎
Hynek's approach to uv and Python projects
I'm super excited to see that Hynek is doing a series on his YouTube channel about Python projects and uv in production. It's set to be a three part series, and the first episode My 2025 uv-based Python Project Layout for Production Apps dropped a few days ago.
I finally had a chance to watch it, and wow ... I'm just so excited to see how it goes. Based on his workflow and workload it might be some time before he's completed, but honestly it's going to be worth the wait.
The approach he's taking is to use uv, but only after manually going through the why's and how's of a Python project so you can have a better sense of what exactly uv is offering you, and when, or why you might want to change it to be different.
I'll likely watch it at least one more time and follow along to get a better sense of what he's working toward.
Can't wait for the next one!
Raspberry Pis
I have THREE raspberry pi's that I bought 7+ years ago now. And they still work as well today as they did then. They really are amazing little machines.
Over their lifetimes their uses have evolved, but I wanted to just write down some quick thoughts on what I do with them now. Let's call them, in no particular order:
- ITFBD!
- Exit Node
- Extra one
ITFDB1!
This raspberry pi sits above the TV in my living room. It reads the MLB API to tell when when a Dodgers game is about to start. It runs a message across a PiHat Sense 8x8 grid and gives the details of the game, i.e. start time, opponent, and record of each team playing. It does this starting 10 minutes before game time every minute until game time. It used to also have a recoding of the legendary Vin Scull saying, "It's Time for Dodger Baseball!" but an update did something to the ability for it to play sound and I've not had the time to resolve it
Exit Node
I'm a big fan of Tailscale thanks to Jeff Triplett. They have a concept of an 'Exit Node' that allows you to look like you're coming from a different location that you actually are. Now, why would anyone want to do this? I have no eartly idea, but sometimes it's fun to pretend that I'm in an area other than Souther California. This typically happens between March and October. But yeah, there's not really a good reason to do this, and I have no idea why one would.
Extra One
The last one mostly just sits around looking sad. It wants to be a thing, but I haven't quite figured out what it can be. At one point it lived as a motion capture camera above a humming bird feeder. It would take snap shots when it saw motion and then at the end of the day it would compile them into a movie and automatically upload them to YouTube. Why? No good reason other than I thought it would be fun to do. I've written a surprising number of posts on this
Raspberry Pi are fun. I highly recommend getting even one to just kind of play around with it.
- It's time for Dodger Baseball ↩︎
Django Simple Deploy and Digital Ocean
Today on Mastodon Eric Matthes posted about his library django-simple-deploy and a plugin for it to be able to deploy to Digital Ocean and I am so pumped for this!
I said as much and Eric asked why.
My answer:
all of my Django apps are deployed to Digital Ocean. I have a “good enough” workflow for deployment, but every time I need to make a new server for a new project I’m mostly looking through a ton of stuff to try and figure out what I did last time. This mostly works in that after a few hours I have what I need, but having something simpler would be very nice … especially if/when I want to help someone with their own deployment to DO
The number of times I have wanted to help automate and/or make deployment easier to Digital Ocean is numerous. It would have been extremely helpful for me when I moved off Heroku and onto Digital Ocean as I had no idea how to do the server setup, or deployment or anything remotely related.
A few years later and I still don't feel 100% comfortable with it all of the time, and I'm a "web professional"
Eric's tool is going to make this so much easier and I'm so here for that!
Back in the pool
After a week long hiatus from swimming I got back to it today. I only swam 1550 yards but it was a good swim. I kind of felt the need to take it a bit easy today given the week long break, and I needed to be at the office a bit early to get ready to help onboard a new employee. While it wasn't a great distance, or a great time (2'45" 100 yd pace) it still felt really good to be back in the pool.
I am again back to feeling 'pretty sleepy' early in the evening which I'm hoping will rid me of the insomnia from last week.
One of the best / weirdest parts of the swim is the honking from the geese. About 25 minutes into my swim they seem to wake up and just start honking at each other ... or maybe at me ... or maybe at the people walking around. Not really sure.
It is slightly off putting. They are very loud, but it also makes me giggle ... so that's something.
Finally
Over the last 2 seasons the Coachella Valley Firebirds were 15-1 against the San Jose Barracuda. The one loss over those 2 seasons was a 5-3 loss at home that was a bit closer than then score showed. Coming into this season I really didn't have any reason to think anything other than we'd be on the same trajectory of beating the Cuda more often than not.
I was wrong.
Coming into tonight's game the Firebirds were 0-4-0-2 against the Cuda with 2 of those loses by only 1 goal ... the hardest being the Teddy Bear Toss in San Jose where the Cuda won 1-0. It was brutal to watch.
Coming into tonight's game I didn't have super high expectations. I texted a friend of mine
OK, in the previous 2 seasons the Firebirds are 15-1 against the Cuda. This year, they're 0-4-0-2. and 4 of those losses are 1 by 1 goal. What's even wilder is that 5 of Stezka's losses are against the Cuda. I think we'll be getting Grubauer today since Stezka is up with Seattle. I'm still a little unsettled about playing them, but maybe this time it will be different?
He replied
It will be different, let's get it!
He was correct. The Firebirds finally got a W against the Cuda ... although the 5-3 score was closer than I would have liked it to be ... and there were plenty of chances for the Cuda to tie it up in the last 90 seconds. But finally, the first win.
For the 2024-25 season we're now 1-4-0-2.
Hopefully we can keep up the winning ways!
Insomnia
I've had a bit of an earache for a while and last weekend I finally got around to going to Immediate Care to have a doctor look at it.
They prescribed some antibiotics and because I think the earache may have been caused by the amount of swimming / time in the pool I have been doing I decided to opt out of swimming last week.
This then also resulted in my opting out of going to the gym at all, and for reasons that I'm still not sure of, I also didn't even bother to go for a walk before work, at lunch, or after work.
Something else that has happened is that 3 of the last 6 nights I have woken up between 2am and 3am and not been able to go back to sleep no matter how hard I tried.
I realized this morning that these two things could be related. I have been swimming a little more than 1 mile 3 days a week for the last 3 or 4 months, and I've been going to the gym for at least 30 minutes 2 days a week.
These activities did a great job of tiring me out, but without them, my body is suddenly like, OK dude, we've got some extra energy to burn off. No need so sleep!
Thankfully my ear is better, and I'll be taking the last of my antibiotic tonight so next week I'll be back at swimming and the gym and hopefully also back to getting a full night's sleep 🤞🏻
Community
Work has been a bit hectic recently which has really cut into some of my open source(ish) community participation, at least the "in person" ones. I've not been able to attend a DSF Office hour, or had a chance to do my writing session, or go to Jeff's Office Hours for a few weeks.
Today was looking like I would miss Jeff's Office Hours again, but I realized that if I could go, even for 30 minutes, I should.
I didn't realize before hand how worth it the experience would be. I was only there for about 30 minutes, but it was such a great experience to see some people I hadn't seen in some while, and to talk a bit about hockey and Python and just generally listen to my friend banter about various things.
These types of community are so necessary and so rejuvenating for me. I need to remember this. Work will be hectic for the foreseeable future ... as with everything, there's too much to do, and not enough time to do it in.
I will most likely forget this again, until I remember it, but hopefully I can work hard to stay engaged in the ways that are helpful and needed for me.
Socks as a means of expression
A friend of mine sent me this image a while ago and it really does pretty much encapsulate my approach to clothes
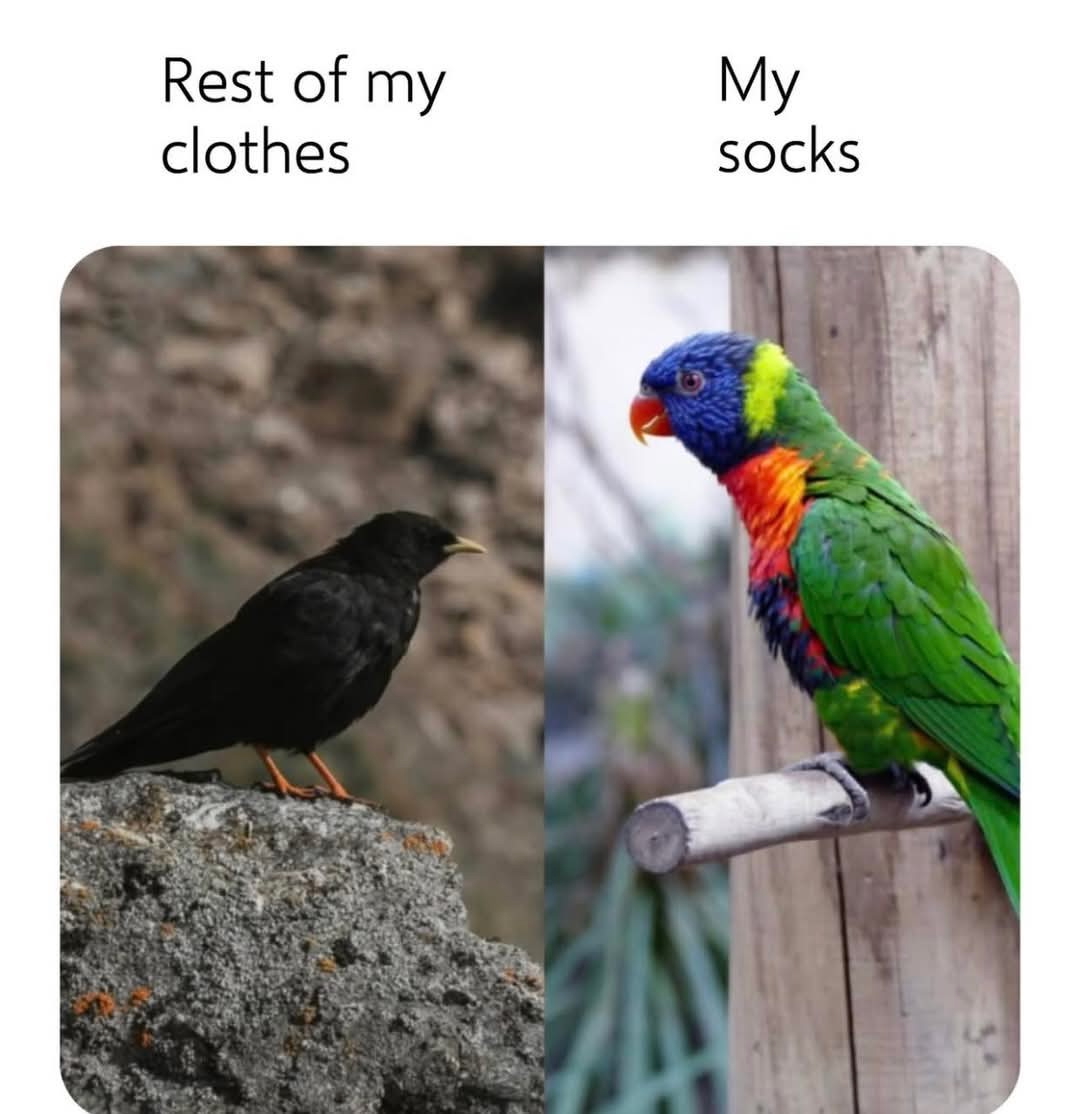
The greatest part about this, in my opinion is that my socks are also always mismatched.
Is this on purpose? Yes!
More that 10 years ago now my daughter A (she's almost 19 now) took a pile of clean clothes that were on her dresser and meant to be put away took them and put them into her hamper instead.
When my wife E and I saw this we decided that A needed to learn how much work and effort went into doing laundry. So next weekend she was responsible for getting it all done (with guidance from her parents of course).
This meant she had to sort the laundry, do the laundry, and put away the laundry.
It was with the putting away where the story gets really good.
After A completed the last load of laundry, which was mostly socks, she was sorting the socks into three piles:
- Her Socks
- E's socks
- My socks
At this point E and I decided that A had it pretty well covered and so our supervision was done.
Now the thing about A is that she had this set of branded Miss Match socks that she LOVED. And she thought that socks were supposed to be thrown into a drawer willy-nilly and not meant to match.
So when A got to sorting mine and E's socks she applied her understanding of socks to our socks (which is 100% understandable!)
As she put away the socks she put her socks into her sock drawer, E's socks into E's sock drawer, and my socks into my sock drawer.
The next morning I was running late and by the time I got to getting my socks and shoes on I saw the sorting method of A. I was a little upset, but mostly just kind of laughed.
I grabbed 2 socks, put them on, and went to work. And you know what happened? Nothing. The world didn't end, I didn't lose my job, and all day I knew something that everyone else didn't. My socks didn't match.
To this day, I still just take my socks and throw them in my sock drawer. In the morning I will pick 2 socks at random and it still makes me smile.
Yes, my socks are wildly colorful ... but they also never match. And that's just fine by me.
Trying
While running through my timeline yesterday I came across a toot from Hynek that linked to a video on YouTube by Nathan Zed and it stopped my in my tracks. Stop what you're doing right now and watch it. Then come back. I can wait.
Did you watch it? Good.
Let's get started.
The link between minimalism and boring is a connection that I hadn't made before, but Nathan Zed is right. The minimalism that we're seeing now is boring.
- Movies all look the same
- TV shows all look the same
- Mainstream Podcasts all sound the same
- Content all looks/sounds the same
And maybe that's the thing. We went from "making stuff" to "producing content1"
So everyone is "making content" and doing it while trying to look effortless and that really does suck. Caring about what you're doing is what makes me want to care about what you're doing. I don't care if you fail, I care that you tried!
People are content creators and that means that they're trying to make a living off of the content that they have created, but that just drives into some super conservative (little c) tendencies that are driven I think by capitalism and the need to make money off of our art ... I mean content. Which in turn makes everything look the fucking same. Sound the fucking same. Be the fucking same.
Last year Jeff Triplett posted # Please publish and share more and at the time I couldn't really put my finger on why this resonated with me so much, but I think now I can.
Writing for the sake of writing is important. Taking photos or creating other art is important for its own sake, not for the sake of creating content to feed into the machine of capitalism. My blog is for me. If others get something out of it, that's great. But it was only when I realized that that I started to write more ... because I didn't care if others liked it or not. If they got something out of it or not. Because I was writing for me. I was "creating content" for me.
Dance like no one's watching, sing like no one's listening, write like no one's reading.
Enjoy the stuff you do. That's kind of the point of doing the thing. It's not to put "content" into the machine
- I really hate that fucking word "content" in this context ↩︎
Page 2 / 24