Django Simple Deploy and Digital Ocean
Today on Mastodon Eric Matthes posted about his library django-simple-deploy and a plugin for it to be able to deploy to Digital Ocean and I am so pumped for this!
I said as much and Eric asked why.
My answer:
all of my Django apps are deployed to Digital Ocean. I have a “good enough” workflow for deployment, but every time I need to make a new server for a new project I’m mostly looking through a ton of stuff to try and figure out what I did last time. This mostly works in that after a few hours I have what I need, but having something simpler would be very nice … especially if/when I want to help someone with their own deployment to DO
The number of times I have wanted to help automate and/or make deployment easier to Digital Ocean is numerous. It would have been extremely helpful for me when I moved off Heroku and onto Digital Ocean as I had no idea how to do the server setup, or deployment or anything remotely related.
A few years later and I still don't feel 100% comfortable with it all of the time, and I'm a "web professional"
Eric's tool is going to make this so much easier and I'm so here for that!
Intro to Djangonaut Space
During my first session with Team Venus today I went through some orientation (for lack of a better term) items with my awesome new Djangonauts. I'm writing it down here because I'm sure I've gone through this same write up before, but darned if I couldn't find it!
There are several ways to contribute to open source, and not all of them are code. Some items I like to call out are:
- Code
- Docs
- Pull Request Review
Many people might think that the only way to contribute is via code, but the other aspects are also super important!
Things I like the Djangonauts (and myself) to keep in mind during the program:
- Contributions aren't a 'race'. Go at your own pace.
- This is a volunteer thing. Life will come up. That's OK. If you have to miss a meeting just let me know.
- Expect to spend about 1 hour per week day (i.e. about 5 hours) per week working on your tickets.
- Fill our your workbooks at the end of each week Sunday; this will help me with getting help for you at these meetings
- Post your wins in Discord!
- Keep in mind the Showcase at the end of the program where you'll have an opportunity to show off what you've been able to do
- Other opportunities:
- Pair programming with other Djangonauts
- If you haven't started a blog, this might be a good time to. Writing up what you've learned can help to make that learning more concrete and can help others in the future (that might include your future self!)
- Writing the Weekly
Updates to Djangosection of the Django News Newsletter - Connect and network with other Djangonauts
The most important thing, I think, is to have fun during this program. This is a unique experience and it should be one that you look back on fondly because you learned some stuff, met some awesome people, and most of all had fun.
Djangonaut Space - Session 4
Next week starts session 4 of Djangonaut Space and I've been selected to be the Navigator for Team Venus with an amazing group of people. As has happened before I go into this with an impossible amount of imposter syndrome lurking over me. While this will be my third time doing this it still feels all new to me and I'm constantly worried that I'm going to "do it wrong".
I have the start of a plan to help with my navigator duties, and I need to get that all written down so that I don't forget what needs to be done and when it needs to be done by! I'm hoping that I'll be able to pick up a ticket and work alongside my Djangonauts as I have done before, but the seasons of life can, and do, have a way of changing quickly.
Perhaps I can just try and focus on getting my one current In Progress ticket wrapped up before diving into a new one 🤔
Anyway, I'm super excited about the prospect of Session 4 and can't wait to "meet" my Djangonauts on our first call next week.
Here's to hoping my imposter syndrome doesn't get the better of me 🚀
Migrating django-tailwind-cli to Django Commons
On Tuesday October 29 I worked with Oliver Andrich, Daniel Moran and Storm Heg to migrate Oliver's project django-tailwind-cli from Oliver's GitHub project to Django Commons.
This was the 5th library that has been migrated over, but the first one that I 'lead'. I was a bit nervous. The Django Commons docs are great and super helpful, but the first time you do something, it can be nerve wracking.
One thing that was super helpful was knowing that Daniel and Storm were there to help me out when any issues came up.
The first set up steps are pretty straight forward and we were able to get through them pretty quickly. Then we ran into an issue that none of us had seen previously.
django-tailwind-cli had initially set up GitHub Pages set up for the docs, but migrated to use Read the Docs. However, the GitHub pages were still set in the repo so when we tried to migrate them over we ran into an error. Apparently you can't remove GitHub pages using Terraform (the process that we use to manage the organization).
We spent a few minutes trying to parse the error, make some changes, and try again (and again) and we were able to finally successfully get the migration completed 🎉
Some other things that came up during the migration was a maintainer that was set in the front end, but not in the terraform file. Also, while I was making changes to the Terraform file locally I ran into an issue with an update that had been done in the GitHub UI on my branch which caused a conflict for me locally.
I've had to deal with this kind of thing before, but ... never with an audience! Trying to work through the issue was a bit stressful to say the least 😅
But, with the help of Daniel and Storm I was able to resolve the conflicts and get the code pushed up.
As of this writing we have 6 libraries that are part of the Django Commons organization and am really excited for the next time that I get to lead a migration. Who knows, at some point I might actually be able to do one on my own ... although our hope is that this can be automated much more ... so maybe that's what I can work on next
Working on a project like this has been really great. There are such great opportunities to learn various technologies (terraform, GitHub Actions, git) and getting to work with great collaborators.
What I'm hoping to be able to work on this coming weekend is1:
- Get a better understanding of Terraform and how to use it with GitHub
- Use Terraform to do something with GitHub Actions
- Try and create a merge conflict and then use the git cli, or Git Tower, or VS Code to resolve the merge conflict
For number 3 in particular I want to have more comfort for fixing those kinds of issues so that if / when they come up again I can resolve them.
- Now will I actually be able to 🤷🏻 ↩︎
DjangoCon US 2024
DjangoCon US 2024
I was able to attend DCUS 2024 this year in Durham from September 22 - September 27, and just like in 2023, it was an amazing experience.
I gave another talk (hooray!) and got to hang out with some truly amazing people, many of whom I call my friends.
I was fortunate in that my talk was on Monday morning, so as soon as my talk was done, I could focus on the conference and less on being nervous about my talk!
One thing I took advantage of this year, that I didn't in previous years, was the 'Hallway Track'. I really enjoyed that time on Monday afternoon to decompress with some of the other speakers in the lobby.
One of the talks that I was able to watch since the conference was Troubleshooting is a Lifestyle 😎 which had this great note: Asking for help is not a sign of failure - it's a strategy.
I am bummed that I missed a few talks live (Product 101 for Techies and Tech Teams, Passkeys: Your password-free future, and Django: the web framework that changed my life) but I will go back and watch them in the next several days and I'm really looking forward to that.
There is a great playlist of ALL of the talks from this year (and previous years) that I highly recommend you search through and watch!
A few others have written about their experiences (Mario Munoz and Will Vincent) and you should totally read those. Some of the
The Food
DCUS via the culinary experience!
Durham has some of the best food and I would go back again JUST for the food. Some of my highlights were
- Cheeni
- Thaiangle of Durham
- Queeny's
- Ponysaurus
- Cocoa Cinnamon
- Pizza Torro
- The conference venue food - fried chicken and peach cobbler were my favorite
The Sprints
During the sprints I was able to work on a few tickets for DjangoPackages12 and get some clarification on a Django doc3 ticket that's I've been wanting to work on for a while now.
The after party in Palm Springs
I left Durham very early on Saturday morning to head back home to Southern California. Leaving a great conference like DjangoCon US can be hard as Kojo has written about.
One upside for me was knowing that a few people from the conference were road tripping out to California and they were going to stop and visit! The following week I had a great dinner with Thibaud, Sage, and Storm at Tac/Quila
Here's a toot on Mastodon with a picture of the 4 of us after dinner
Looking Forward
I just feel so much more clam after the conference, and am super happy.
I'm looking forward to my involvement in the Django Community until the next DjangoCon I'm able to attend4. Some things specifically are:
- Working on Django tickets
- Admin work with Django Commons with Tim, Lacey, Daniel, and Storm
- Working on Django Packages with Jeff and Maksudul
- Djangonaut Space (if and when they need a navigator but just hanging out in the discord is pretty awesome too!)
I'm so grateful for the friends and community that Django has given to me. I'm really hoping to be able to pay it forward with my involvement over the next year until I have a chance to see all of these amazing people in person again
Django Commons
First, what are "the commons"? The concept of "the commons" refers to resources that are shared and managed collectively by a community, rather than being owned privately or by the state. This idea has been applied to natural resources like air, water, and grazing land, but it has also expanded to include digital and cultural resources, such as open-source software, knowledge databases, and creative works.
As Organization Administrators of Django Commons, we're focusing on sustainability and stewardship as key aspects.
Asking for help is hard, but it can be done more easily in a safe environment. As we saw with the xz utils backdoor attack, maintainer burnout is real. And while there are several arguments about being part of a 'supply chain' if we can, as a community, offer up a place where maintainers can work together for the sustainability and support of their packages, Django community will be better off!
From the README of the membership repo in Django Commons
Django Commons is an organization dedicated to supporting the community's efforts to maintain packages. It seeks to improve the maintenance experience for all contributors; reducing the barrier to entry for new contributors and reducing overhead for existing maintainers.
OK, but what does this new organization get me as a maintainer? The (stretch) goal is that we'll be able to provide support to maintainers. Whether that's helping to identify best practices for packages (like requiring tests), or normalize the idea that maintainers can take a step back from their project and know that there will be others to help keep the project going. Being able to accomplish these two goals would be amazing ... but we want to do more!
In the long term we're hoping that we're able to do something to help provide compensation to maintainers, but as I said, that's a long term goal.
The project was spearheaded by Tim Schilling and he was able to get lots of interest from various folks in the Django Community. But I think one of the great aspects of this community project is the transparency that we're striving for. You can see here an example of a discussion, out in the open, as we try to define what we're doing, together. Also, while Tim spearheaded this effort, we're really all working as equals towards a common goal.
What we're building here is a sustainable infrastructure and community. This community will allow packages to have a good home, to allow people to be as active as they want to be, and also allow people to take a step back when they need to.
Too often in tech, and especially in OSS, maintainers / developers will work and work and work because the work they do is generally interesting, and has interesting problems to try and solve.
But this can have a downside that we've all seen .. burnout.
By providing a platform for maintainers to 'park' their projects, along with the necessary infrastructure to keep them active, the goal is to allow maintainers the opportunity to take a break if, or when, they need to. When they're ready to return, they can do so with renewed interest, with new contributors and maintainers who have helped create a more sustainable environment for the open-source project.
The idea for this project is very similar to, but different from, Jazz Band. Again, from the README
Django Commons and Jazzband have similar goals, to support community-maintained projects. There are two main differences. The first is that Django Commons leans into the GitHub paradigm and centers the organization as a whole within GitHub. This is a risk, given there's some vendor lock-in. However, the repositories are still cloned to several people's machines and the organization controls the keys to PyPI, not GitHub. If something were to occur, it's manageable.
The second is that Django Commons is built from the beginning to have more than one administrator. Jazzband has been working for a while to add additional roadies (administrators), but there hasn't been visible progress. Given the importance of several of these projects it's a major risk to the community at large to have a single point of failure in managing the projects. By being designed from the start to spread the responsibility, it becomes easier to allow people to step back and others to step up, making Django more sustainable and the community stronger.
One of the goals for Django Commons is to be very public about what's going on. We actively encourage use of the Discussions feature in GitHub and have several active conversations happening there now1 2 3
So far we've been able to migrate ~3~ 4 libraries4 5 6 7into Django Commons. Each one has been a great learning experience, not only for the library maintainers, but also for the Django Commons admins.
We're working to automate as much of the work as possible. Daniel Moran has done an amazing job of writing Terraform scripts to help in the automation process.
While there are still several manual steps, with each new library, we discover new opportunities for automation.
This is an exciting project to be a part of. If you're interested in joining us you have a couple of options
- Transfer your project into Django Commons
- Join as member and help contribute to one of the projects that's already in Django Commons
I'm looking forward to seeing you be part of this amazing community!
DjangoCon US 2023
My Experience at DjangoCon US 2023
A few days ago I returned from DjangoCon US 2023 and wow, what an amazing time. The only regret I have is that I didn't take very many pictures. This is something I will need to work on for next year.
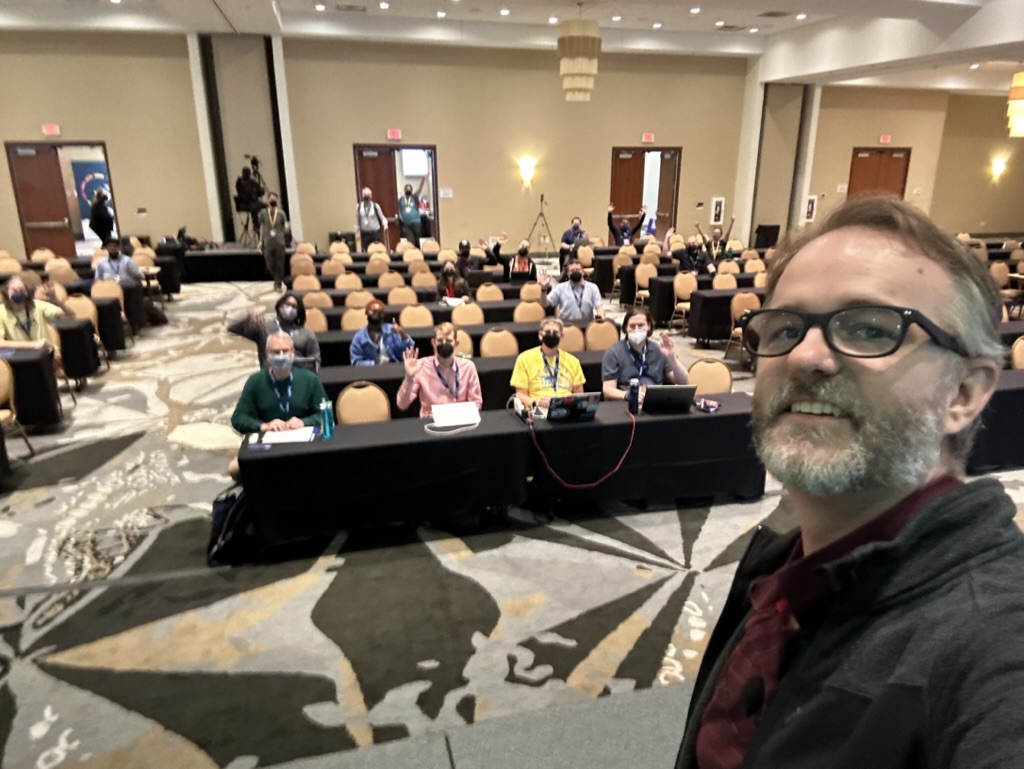
On Monday October 16th I gave a talk Contributing to Django or how I learned to stop worrying and just try to fix an ORM Bug. The video will be posted on YouTube in a few weeks. This was the first tech conference I've ever spoken at!!!! I was super nervous leading up to the talk, and even a bit at the start, but once I got going I finally settled in.
Here's me on stage taking a selfie with the crowd behind me
Luckily, my talk was one of the first non-Keynote talks so I was able to relax and enjoy the conference while the rest of the time.
After the conference talks ended on Wednesday I stuck around for the sprints. This is such a great time to be able to work on open source projects (Django adjacent or not) and just generally hang out with other Djangonauts. I was able to do some work on DjangoPackages with Jeff Triplett, and just generally hang out with some truly amazing people.
The Django community is just so great. I've been to many conferences before, but this one is the first where I feel like I belong.
I am having some of those post conference blues, but thankfully Kojo Idrissa wrote something about how to help with that. And taking his advice, it has been helpful to come down from the Conference high.
Although the location of DjangoCon US 2024 hasn't been announced yet, I'm making plans to attend.
I am also setting myself some goals to have completed by the start of DCUS 2024
- join the fundraising working group
- work on at least 1 code related ticket in Trac
- work on at least 1 doc related ticket in Trac
- have been part of a writing group with fellow Djangonauts and posted at least 1 article per month
I had a great experience speaking, and I think I'd like to do it again, but I'm still working through that.
It's a lot harder to give a talk than I thought it would be! That being said, I do have in my 'To Do' app a task to 'Brainstorm DjangoCon talk ideas' so we'll see if (1) I'm able to come up with anything, and (2) I have a talk accepted for 2024.
Contributing to Django or how I learned to stop worrying and just try to fix an ORM Bug
I went to DjangoCon US a few weeks ago and hung around for the sprints. I was particularly interested in working on open tickets related to the ORM. It so happened that Simon Charette was at Django Con and was able to meet with several of us to talk through the inner working of the ORM.
With Simon helping to guide us, I took a stab at an open ticket and settled on 10070. After reviewing it on my own, and then with Simon, it looked like it wasn't really a bug anymore, and so we agreed that I could mark it as done.
Kind of anticlimactic given what I was hoping to achieve, but a closed ticket is a closed ticket! And so I tweeted out my accomplishment for all the world to see.
A few weeks later though, a comment was added that it actually was still a bug and it was reopened.
I was disappointed ... but I now had a chance to actually fix a real bug! I started in earnest.
A suggestion / pattern for working through learning new things that Simon Willison had mentioned was having a public-notes repo on GitHub. He's had some great stuff that he's worked through that you can see here.
Using this as a starting point, I decided to walk through what I learned while working on this open ticket.
Over the course of 10 days I had a 38 comment 'conversation with myself' and it was super helpful!
A couple of key takeaways from working on this issue:
- Carlton Gibson said essentially once you start working a ticket from Trac, you are the world's foremost export on that ticket ... and he's right!
- ... But, you're not working the ticket alone! During the course of my work on the issue I had help from Simon Charette, Mariusz Felisiak, Nick Pope, and Shai Berger
- The ORM can seem big and scary ... but remember, it's just Python
I think that each of these lesson learned is important for anyone thinking of contributing to Django (or other open source projects).
That being said, the last point is one that I think can't be emphasized enough.
The ORM has a reputation for being this big black box that only 'really smart people' can understand and contribute to. But, it really is just Python.
If you're using Django, you know (more likely than not) a little bit of Python. Also, if you're using Django, and have written any models, you have a conceptual understanding of what SQL is trying to do (well enough I would argue) that you can get in there AND make sense of what is happening.
And if you know a little bit of Python a great way to learn more is to get into a project like Django and try to fix a bug.
My initial solution isn't the final one that got merged ... it was a collaboration with 4 people, 2 of whom I've never met in real life, and the other 2 I only just met at DjangoCon US a few weeks before.
While working through this I learned just as much from the feedback on my code as I did from trying to solve the problem with my own code.
All of this is to say, contributing to open source can be hard, it can be scary, but honestly, I can't think of a better place to start than Django, and there are lots of places to start.
And for those of you feeling a bit adventurous, there are plenty of ORM tickets just waiting for you to try and fix them!
Django and Legacy Databases
I work at a place that is heavily investing in the Microsoft Tech Stack. Windows Servers, c#.Net, Angular, VB.net, Windows Work Stations, Microsoft SQL Server ... etc
When not at work, I really like working with Python and Django. I've never really thought I'd be able to combine the two until I discovered the package mssql-django which was released Feb 18, 2021 in alpha and as a full-fledged version 1 in late July of that same year.
Ever since then I've been trying to figure out how to incorporate Django into my work life.
I'm going to use this series as an outline of how I'm working through the process of getting Django to be useful at work. The issues I run into, and the solutions I'm (hopefully) able to achieve.
I'm also going to use this as a more in depth analysis of an accompanying talk I'm hoping to give at Django Con 2022 later this year.
I'm going to break this down into a several part series that will roughly align with the talk I'm hoping to give. The parts will be:
- Introduction/Background
- Overview of the Project
- Wiring up the Project Models
- Database Routers
- Django Admin Customization
- Admin Documentation
- Review & Resources
My intention is to publish one part every week or so. Sometimes the posts will come fast, and other times not. This will mostly be due to how well I'm doing with writing up my findings and/or getting screenshots that will work.
The tool set I'll be using is:
- docker
- docker-compose
- Django
- MS SQL
- SQLite
I made a Slackbot!
Building my first Slack Bot
I had added a project to my OmniFocus database in November of 2021 which was, "Build a Slackbot" after watching a Video by Mason Egger. I had hoped that I would be able to spend some time on it over the holidays, but I was never able to really find the time.
A few weeks ago, Bob Belderbos tweeted:
If you were to build a Slack bot, what would it do?
— Bob Belderbos (@bbelderbos) February 2, 2022
And I responded
I work in US Healthcare where there are a lot of Acronyms (many of which are used in tech but have different meaning), so my slack bot would allow a user to enter an acronym and return what it means, i.e., CMS = Centers for Medicare and Medicaid Services.
— The B Is Silent (@ryancheley) February 2, 2022
I didn't really have anymore time now than I did over the holiday, but Bob asking and me answering pushed me to actually write the darned thing.
I think one of the problems I encountered was what backend / tech stack to use. I'm familiar with Django, but going from 0 to something in production has a few steps and although I know how to do them ... I just felt ~overwhelmed~ by the prospect.
I felt equally ~overwhelmed~ by the prospect of trying FastAPI to create the API or Flask, because I am not as familiar with their deployment story.
Another thing that was different now than before was that I had worked on a Django Cookie Cutter to use and that was 'good enough' to try it out. So I did.
I ran into a few problems while working with my Django Cookie Cutter but I fixed them and then dove head first into writing the Slack Bot
The model
The initial implementation of the model was very simple ... just 2 fields:
class Acronym(models.Model):
    acronym = models.CharField(max_length=8)
    definition = models.TextField()

    def save(self, *args, **kwargs):
        self.acronym = self.acronym.lower()
        super(Acronym, self).save(*args, **kwargs)

    class Meta:
        unique_together = ("acronym", "definition")
        ordering = ["acronym"]

    def __str__(self) -> str:
        return self.acronym
Next I created the API using Django Rest Framework using a single serializer
class AcronymSerializer(serializers.ModelSerializer):
    class Meta:
        model = Acronym
        fields = [
            "id",
            "acronym",
            "definition",
        ]
which is used by a single view
class AcronymViewSet(viewsets.ReadOnlyModelViewSet):
    serializer_class = AcronymSerializer
    queryset = Acronym.objects.all()

    def get_object(self):
        queryset = self.filter_queryset(self.get_queryset())
        print(self.kwargs["acronym"])
        acronym = self.kwargs["acronym"]
        obj = get_object_or_404(queryset, acronym__iexact=acronym)

        return obj
and exposed on 2 end points:
from django.urls import include, path

from .views import AcronymViewSet, AddAcronym, CountAcronyms, Events

app_name = "api"

user_list = AcronymViewSet.as_view({"get": "list"})
user_detail = AcronymViewSet.as_view({"get": "retrieve"})

urlpatterns = [
    path("", AcronymViewSet.as_view({"get": "list"}), name="acronym-list"),
    path("<acronym>/", AcronymViewSet.as_view({"get": "retrieve"}), name="acronym-detail"),
    path("api-auth/", include("rest_framework.urls", namespace="rest_framework")),
]
Getting the data
At my joby-job we use Jira and Confluence. In one of our Confluence spaces we have a Glossary page which includes nearly 200 acronyms. I had two choices:
- Copy and Paste the acronym and definition for each item
- Use Python to get the data
I used Python to get the data, via a Jupyter Notebook, but I didn't seem to save the code anywhere (🤦🏻), so I can't include it here. But trust me, it was 💯.
Setting up the Slack Bot
Although I had watched Mason's video, since I was building this with Django I used this article as a guide in the development of the code below.
The code from my views.py is below:
ssl_context = ssl.create_default_context()
ssl_context.check_hostname = False
ssl_context.verify_mode = ssl.CERT_NONE

SLACK_VERIFICATION_TOKEN = getattr(settings, "SLACK_VERIFICATION_TOKEN", None)
SLACK_BOT_USER_TOKEN = getattr(settings, "SLACK_BOT_USER_TOKEN", None)
CONFLUENCE_LINK = getattr(settings, "CONFLUENCE_LINK", None)
client = slack.WebClient(SLACK_BOT_USER_TOKEN, ssl=ssl_context)

class Events(APIView):
    def post(self, request, *args, **kwargs):

        slack_message = request.data

        if slack_message.get("token") != SLACK_VERIFICATION_TOKEN:
            return Response(status=status.HTTP_403_FORBIDDEN)

        # verification challenge
        if slack_message.get("type") == "url_verification":
            return Response(data=slack_message, status=status.HTTP_200_OK)
        # greet bot
        if "event" in slack_message:
            event_message = slack_message.get("event")

            # ignore bot's own message
            if event_message.get("subtype"):
                return Response(status=status.HTTP_200_OK)

            # process user's message
            user = event_message.get("user")
            text = event_message.get("text")
            channel = event_message.get("channel")
            url = f"https://slackbot.ryancheley.com/api/{text}/"
            response = requests.get(url).json()
            definition = response.get("definition")
            if definition:
                message = f"The acronym '{text.upper()}' means: {definition}"
            else:
                confluence = CONFLUENCE_LINK + f'/dosearchsite.action?cql=siteSearch+~+"{text}"'
                confluence_link = f"<{confluence}|Confluence>"
                message = f"I'm sorry <@{user}> I don't know what *{text.upper()}* is :shrug:. Try checking {confluence_link}."

            if user != "U031T0UHLH1":
                client.chat_postMessage(
                    blocks=[{"type": "section", "text": {"type": "mrkdwn", "text": message}}], channel=channel
                )
                return Response(status=status.HTTP_200_OK)
        return Response(status=status.HTTP_200_OK)
Essentially what the Slack Bot does is takes in the request.data['text'] and checks it against the DRF API end point to see if there is a matching Acronym.
If there is, then it returns the acronym and it's definition.
If it's not, you get a message that it's not sure what you're looking for, but that maybe Confluence1 can help, and gives a link to our Confluence Search page.
The last thing you'll notice is that if the User has a specific ID it won't respond with a message. That's because in my initial testing I just had the Slack Bot replying to the user saying 'Hi' with a 'Hi' back to the user.
I had a missing bit of logic though, so once you said hi to the Slack Bot, it would reply back 'Hi' and then keep replying 'Hi' because it was talking to itself. It was comical to see in real time 😂.
Using ngrok to test it locally
ngrok is a great tool for taking a local url, like localhost:8000/api/entpoint, and exposing it on the internet with a url like https://a123-45-678-901-234.ngrok.io/api/entpoint. This allows you to test your local code and see any issues that might arise when pushed to production.
As I mentioned above the Slack Bot continually said "Hi" to itself in my initial testing. Since I was running ngrok to serve up my local Server I was able to stop the infinite loop by stopping my local web server. This would have been a little more challenging if I had to push my code to an actual web server first and then tested.
Conclusion
This was such a fun project to work on, and I'm really glad that Bob tweeted asking what Slack Bot we would build.
That gave me the final push to actually build it.
- You'll notice that I'm using an environment variable to define the Confluence Link and may wonder why. It's mostly to keep the actual Confluence Link used at work non-public and not for any other reason 🤷🏻 ↩︎
Page 1 / 4