CBV - UpdateView
From Classy Class Based Views UpdateView
View for updating an object, with a response rendered by a template.
Attributes
Two attributes are required to get the template to render. We’ve seen queryset before and in CreateView we saw fields. As a brief refresher
- fields: specifies what fields from the model or queryset will be displayed on the rendered template. You can you set
fieldsto__all__if you want to return all of the fields - success_url: you’ll want to specify this after the record has been updated so that you know the update was made.
Example
views.py
class myUpdateView(UpdateView):
    queryset = Person.objects.all()
    fields = '__all__'
    extra_context = {
        'type': 'Update'
    }
    success_url = reverse_lazy('rango:list_view')
urls.py
path('update_view/<int:pk>', views.myUpdateView.as_view(), name='update_view'),
\<template>.html
{% block content %}
    <h3>{{ type }} View</h3>
    {% if type == 'Create' %}
        <form action="." method="post">
    {% else %}
        <form action="{% url 'rango:update_view' object.id %}" method="post">
    {% endif %}
    {% csrf_token %}
    <table>
    {{ form.as_p }}
    </table>
    <button type="submit">SUBMIT</button>
    </form>
{% endblock %}
Diagram
A visual representation of how UpdateView is derived can be seen here:

Conclusion
A simple way to implement a form to update data in a model. Step 3 for a CRUD app is now complete!
My first commit to an Open Source Project: Django
Last September the annual Django Con was held in San Diego. I really wanted to go, but because of other projects and conferences for my job, I wasn’t able to make it.
The next best thing to to watch the videos from DjangoCon on YouTube. I watched a couple of the videos, but one that really caught my attention was by Carlton Gibson titled “Your Web Framework Needs You: An Update by Carlton Gibson”.
I took what Carlton said to heart and thought, I really should be able to do something to help.
I went to the Django Issues site and searched for an Easy Pickings issue that involved documentation and found issue 31006 “Document how to escape a date/time format character for the |date and |time filters.”
I read the steps on what I needed to do to submit a pull request, but since it was my first time ever participating like this … I was a bit lost.
Luckily there isn’t anything that you can break, so I was able to wonder around for a bit and get my bearings.
I forked the GitHub repo and I cloned it locally.
I then spent an embarrassingly long time trying to figure out where the change was going to need to be made, and exactly what needed to change.
Finally, with my changes made, I pushed my code changes to GitHub and waited.
Within a few hours Mariusz Felisiak replied back and asked about a suggestion he had made (but which I missed). I dug back into the documentation, found what he was referring to, and made (what I thought) was his suggested change.
Another push and a bit more waiting.
Mariusz Felisiak replied back with some input about the change I pushed up, and I realized I had missed the mark on what he was suggesting.
OK. Third time’s a charm, right?
Turns out, in this case it was. I pushed up one last time and this time, my changes were merged into the master and just like that, I am now a contributor to Django (albeit a very, very, very minor contributor).
Overall, this was a great experience, both with respect to learning about contributing to an open source project, as well as learning about GitHub.
I’m hoping that with the holidays upon us I’ll be able to find the time to pick up one or two (maybe even three) Easy Pickings issues from the Django issue tracker.
CBV - FormView
From Classy Class Based Views FormView
A view for displaying a form and rendering a template response.
Attributes
The only new attribute to review this time is form_class. That being said, there are a few implementation details to cover
- form_class: takes a Form class and is used to render the form on the
htmltemplate later on.
Methods
Up to this point we haven’t really needed to override a method to get any of the views to work. This time though, we need someway for the view to verify that the data is valid and then save it somewhere.
- form_valid: used to verify that the data entered is valid and then saves to the database. Without this method your form doesn’t do anything
Example
This example is a bit more than previous examples. A new file called forms.py is used to define the form that will be used.
forms.py
from django.forms import ModelForm
from rango.models import Person


class PersonForm(ModelForm):
    class Meta:
        model = Person
        exclude = [
            'post_date',
        ]
views.py
class myFormView(FormView):
    form_class = PersonForm
    template_name = 'rango/person_form.html'
    extra_context = {
        'type': 'Form'
    }
    success_url = reverse_lazy('rango:list_view')

    def form_valid(self, form):
        person = Person.objects.create(
            first_name=form.cleaned_data['first_name'],
            last_name=form.cleaned_data['last_name'],
            post_date=datetime.now(),
        )
        return super(myFormView, self).form_valid(form)
urls.py
path('form_view/', views.myFormView.as_view(), name='form_view'),
\<template_name>.html
    <h3>{{ type }} View</h3>
    {% if type != 'Update' %}
        <form action="." method="post">
    {% else %}
        <form action="{% url 'rango:update_view' object.id %}" method="post">
    {% endif %}
    {% csrf_token %}
    <table>
    {{ form.as_p }}
    </table>
    <button type="submit">SUBMIT</button>
    </form>
Diagram
A visual representation of how FormView is derived can be seen here:

Conclusion
I really struggled with understanding why you would want to implement FormView. I found this explanation on Agiliq and it helped me grok the why:
FormView should be used when you need a form on the page and want to perform certain action when a valid form is submitted. eg: Having a contact us form and sending an email on form submission.
CreateView would probably be a better choice if you want to insert a model instance in database on form submission.
While my example above works, it’s not the intended use of FormView. Really, it’s just an implementation of CreateView using FormView
CBV - CreateView
From Classy Class Based Views CreateView
View for creating a new object, with a response rendered by a template.
Attributes
Three attributes are required to get the template to render. Two we’ve seen before (queryset and template_name). The new one we haven’t see before is the fields attribute.
- fields: specifies what fields from the model or queryset will be displayed on the rendered template. You can you set
fieldsto__all__if you want to return all of the fields
Example
views.py
queryset = Person.objects.all()
fields = '__all__'
template_name = 'rango/person_form.html'
urls.py
path('create_view/', views.myCreateView.as_view(), name='create_view'),
\<template>.html
{% extends 'base.html' %}

    <h1>
    {% block title %}
        {{ title }}
    {% endblock %}
    </h1>


{% block content %}
    <h3>{{ type }} View</h3>
    <form action="." method="post">
    {% csrf_token %}
    <table>
    {{ form.as_p }}
    </table>
    <button type="submit">SUBMIT</button>
    </form>
{% endblock %}
Diagram
A visual representation of how CreateView is derived can be seen here:

Conclusion
A simple way to implement a form to create items for a model. We’ve completed step 1 for a basic CRUD application.
CBV - DayArchiveView
From Classy Class Based Views DayArchiveView
List of objects published on a given day.
Attributes
There are six new attributes to review here … well really 3 new ones and then a formatting attribute for each of these 3:
- day: The day to be viewed
- day_format: The format of the day to be passed. Defaults to
%d - month: The month to be viewed
- month_format: The format of the month to be passed. Defaults to
%b - year: The year to be viewed
- year_format: The format of the year to be passed. Defaults to
%Y
Required Attributes
- day
- month
- year
- date_field: The field that holds the date that will drive every else. We saw this in ArchiveIndexView
Additionally you also need model or queryset
The day, month, and year can be passed via urls.py so that they do’t need to be specified in the view itself.
Example:
views.py
class myDayArchiveView(DayArchiveView):
    month_format = '%m'
    date_field = 'post_date'
    queryset = Person.objects.all()
    context_object_name = 'person'
    paginate_by = 10
    page_kwarg = 'name'
urls.py
path('day_archive_view/<int:year>/<int:month>/<int:day>/', views.myDayArchiveView.as_view(), name='day_archive_view'),
\<model_name>_archiveday.html
{% extends 'base.html' %}
<h1>
{% block title %}
{{ title }}
{% endblock %}
</h1>
{% block content %}
<div>
<ul>
{% for p in person %}
<li><a href="{% url 'rango:detail_view' p.first_name %}">{{ p.post_date }}: {{ p.first_name }} {{ p.last_name }}</a></li>
{% endfor %}
</ul>
</div>
<div class="">
{% if is_paginated %}
<ul class="mui-list--inline mui--text-body2">
{% if page_obj.has_previous %}
<li><a href="?name={{ page_obj.previous_page_number }}">«</a></li>
{% else %}
<li class="disabled"><span>«</span></li>
{% endif %}
{% for i in paginator.page_range %}
{% if page_obj.number == i %}
<li class="active"><span>{{ i }} <span class="sr-only">(current)</span></span></li>
{% else %}
<li><a href="?name={{ i }}">{{ i }}</a></li>
{% endif %}
{% endfor %}
{% if page_obj.has_next %}
<li><a href="?name={{ page_obj.next_page_number }}">»</a></li>
{% else %}
<li class="disabled"><span>»</span></li>
{% endif %}
</ul>
{% endif %}
</div>
{% endblock %}
Diagram
A visual representation of how DayArchiveView is derived can be seen here:

Conclusion
If you have date based content a great tool to use and again super easy to implement.
There are other time based CBV for Today, Date, Week, Month, and Year. They all do the same thing (generally) so I won’t review those.
CBV - ArchiveIndexView
From Classy Class Based Views ArchiveIndexView
Top-level archive of date-based items.
Attributes
There are 20 attributes that can be set for the ArchiveIndexView but most of them are based on ancestral Classes of the CBV so we won’t be going into them in Detail.
DateMixin Attributes
- allow_future: Defaults to False. If set to True you can show items that have dates that are in the future where the future is anything after the current date/time on the server.
- date_field: the field that the view will use to filter the date on. If this is not set an error will be generated
- uses_datetime_field: Convert a date into a datetime when the date field is a DateTimeField. When time zone support is enabled,
dateis assumed to be in the current time zone, so that displayed items are consistent with the URL.
BaseDateListView Attributes
-
allow_empty: Defaults to
False. This means that if there is no data a404error will be returned with the messageNo __str__ Availablewhere ‘__str__’ is the display of your model -
date_list_period: This attribute allows you to break down by a specific period of time (years, months, days, etc.) and group your date driven items by the period specified. See below for implementation
For year
views.py
date_list_period='year'
urls.py
Nothing special needs to be done
\<file_name_>.html
{% block content %}
    <div>
        {%  for date in date_list %}
        {{ date.year }}
        <ul>
        {% for p in person %}
            {% if date.year == p.post_date.year %}
                <li>{{ p.post_date }}: {{ p.first_name }} {{ p.last_name }}</li>
            {% endif %}
        {% endfor %}
        </ul>
        {% endfor %}
    </div>
{% endblock %}
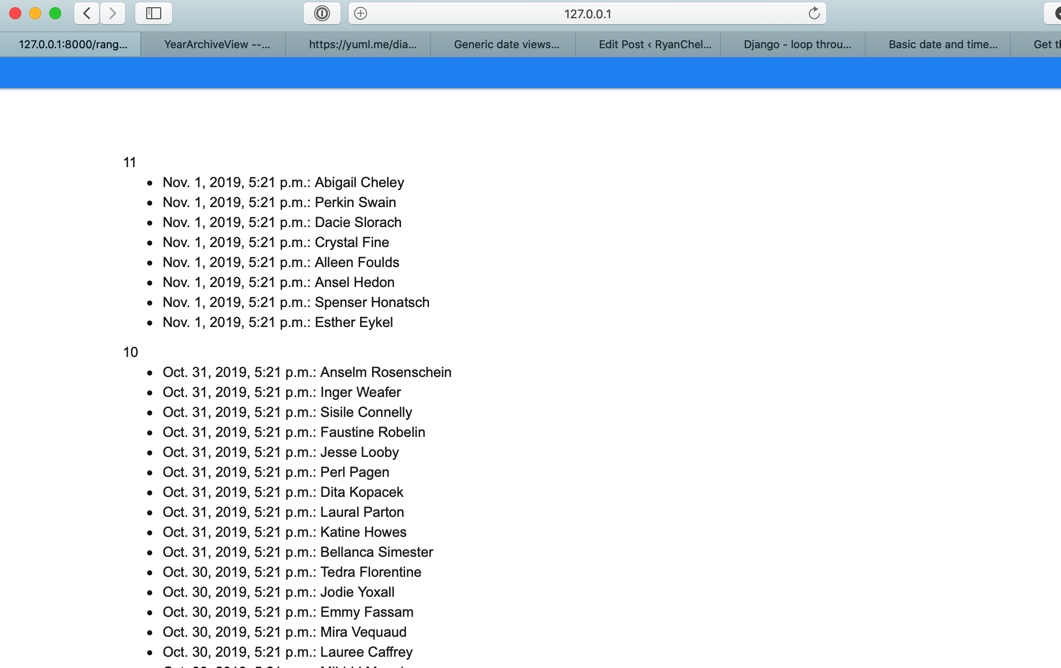
Will render:

For month
views.py
date_list_period='month'
urls.py
Nothing special needs to be done
\<file_name_>.html
{% block content %}
    <div>
        {%  for date in date_list %}
        {{ date.month }}
        <ul>
        {% for p in person %}
            {% if date.month == p.post_date.month %}
                <li>{{ p.post_date }}: {{ p.first_name }} {{ p.last_name }}</li>
            {% endif %}
        {% endfor %}
        </ul>
        {% endfor %}
    </div>
{% endblock %}
Will render:
BaseArchiveIndexView Attributes
- context_object_name: Name the object used in the template. As stated before, you’re going to want to do this so you don’t hate yourself (or have other developers hate you).
Other Attributes
MultipleObjectMixin Attributes
These attributes were all reviewed in the ListView post
- model = None
- ordering = None
- page_kwarg = 'page'
- paginate_by = None
- paginate_orphans = 0
- paginator_class = \<class 'django.core.paginator.Paginator'>
- queryset = None
TemplateResponseMixin Attributes
This attribute was reviewed in the ListView post
- content_type = None
ContextMixin Attributes
This attribute was reviewed in the ListView post
- extra_context = None
View Attributes
This attribute was reviewed in the View post
- http_method_names = ['get', 'post', 'put', 'patch', 'delete', 'head', 'options', 'trace']
TemplateResponseMixin Attributes
These attributes were all reviewed in the ListView post
- response_class = \<class 'django.template.response.TemplateResponse'>
- template_engine = None
- template_name = None
Diagram
A visual representation of how ArchiveIndexView is derived can be seen here:

Conclusion
With date driven data (articles, blogs, etc.) The ArchiveIndexView is a great CBV and super easy to implement.
CBV - DetailView
From Classy Class Based Views DetailView
Render a "detail" view of an object.
By default this is a model instance looked up from
self.queryset, but the view will support display of any object by overridingself.get_object().
There are 7 attributes for the DetailView that are derived from the SingleObjectMixin. I’ll talk about five of them and the go over the ‘slug’ fields in their own section.
- context_object_name: similar to the
ListViewit allows you to give a more memorable name to the object in the template. You’ll want to use this if you want to have future developers (i.e. you) not hate you - model: similar to the
ListViewexcept it only returns a single record instead of all records for the model based on a filter parameter passed via theslug - pk_url_kwarg: you can set this to be something other than pk if you want … though I’m not sure why you’d want to
- query_pk_and_slug: The Django Docs have a pretty clear explanation of what it does
This attribute can help mitigate insecure direct object reference attacks. When applications allow access to individual objects by a sequential primary key, an attacker could brute-force guess all URLs; thereby obtaining a list of all objects in the application. If users with access to individual objects should be prevented from obtaining this list, setting querypkand*slug to True will help prevent the guessing of URLs as each URL will require two correct, non-sequential arguments. Simply using a unique slug may serve the same purpose, but this scheme allows you to have non-unique slugs. *
- queryset: used to return data to the view. It will supersede the value supplied for
modelif both are present
The Slug Fields
There are two attributes that I want to talk about separately from the others:
- slug_field
- slug_url_kwarg
If neither slug_field nor slug_url_kwarg are set the the url must contain <int:pk>. The url in the template needs to include o.id
views.py
There is nothing to show in the views.py file in this example
urls.py
path('detail_view/<int:pk>', views.myDetailView.as_view(), name='detail_view'),
\<ListView>.html
{% url 'rango:detail_view' o.id %}
If slug_field is set but slug_url_kwarg is NOT set then the url can be <slug>. The url in the template needs to include o.<slug_field>
views.py
class myDetailView(DetailView):
    slug_field = 'first_name'
urls.py
path('detail_view/<slug>/', views.myDetailView.as_view(), name='detail_view'),
\<ListView>.html
{% url 'rango:detail_view' o.first_name %}
If slug_field is not set but slug_url_kwarg is set then you get an error. Don’t do this one.
If both slug_field and slug_url_kwarg are set then the url must be <value> where value is what the parameters are set to. The url in the template needs to include o.<slug_field>
views.py
class myDetailView(DetailView):
    slug_field = 'first_name'
    slug_url_kwarg = 'first_name'
urls.py
path('detail_view/<first_name>/', views.myDetailView.as_view(), name='detail_view'),
\<ListView>.html
{% url 'rango:detail_view' o.first_name %}
Diagram
A visual representation of how DetailView is derived can be seen here:

Conclusion
I think the most important part of the DetailView is to remember its relationship to ListView. Changes you try to implement on the Class for DetailView need to be incorporated into the template associated with the ListView you have.
CBV - BaseListView
From Classy Class Based Views BaseListView
A base view for displaying a list of objects.
And from the Django Docs:
A base view for displaying a list of objects. It is not intended to be used directly, but rather as a parent class of the django.views.generic.list.ListView or other views representing lists of objects.
Almost all of the functionality of BaseListView comes from the MultipleObjectMixin. Since the Django Docs specifically say don’t use this directly, I won’t go into it too much.
Diagram
A visual representation of how BaseListView is derived can be seen here:

Conclusion
Don’t use this. It should be subclassed into a usable view (a la ListView).
There are many Base views that are ancestors for other views. I’m not going to cover any more of them going forward UNLESS the documentation says there’s a specific reason to.
CBV - ListView
From Classy Class Based Views ListView:
Render some list of objects, set by
self.modelorself.queryset.
self.querysetcan actually be any iterable of items, not just a queryset.
There are 16 attributes for the ListView but only 2 types are required to make the page return something other than a 500 error:
- Data
- Template Name
Data Attributes
You have a choice of either using Model or queryset to specify what data to return. Without it you get an error.
The Model attribute gives you less control but is easier to implement. If you want to see ALL of the records of your model, just set
model = ModelName
However, if you want to have a bit more control over what is going to be displayed you’ll want to use queryset which will allow you to add methods to the specified model, ie filter, order_by.
queryset = ModelName.objects.filter(field_name='filter')
If you specify both model and queryset then queryset takes precedence.
Template Name Attributes
You have a choice of using template_name or template_name_suffix. The template_name allows you to directly control what template will be used. For example, if you have a template called list_view.html you can specify it directly in template_name.
template_name_suffix will calculate what the template name should be by using the app name, model name, and appending the value set to the template_name_suffix.
In pseudo code:
templates/<app_name>/<model_name>_<template_name_suffix>.html
For an app named rango and a model named person setting template_name_suffix to _test would resolve to
templates/rango/person_test.html
Other Attributes
If you want to return something interesting you’ll also need to specify
- allow_empty: The default for this is true which allows the page to render if there are no records. If you set this to
falsethen returning no records will result in a 404 error - context_object_name: allows you to give a more memorable name to the object in the template. You’ll want to use this if you want to have future developers (i.e. you) not hate you
- ordering: allows you to specify the order that the data will be returned in. The field specified must exist in the
modelorquerysetthat you’ve used - page_kwarg: this indicates the name to use when going from page x to y; defaults to
namebut overriding it to something more sensible can be helpful for SEO. For example you can usenameinstead ofpageif you’ve got a page that has a bunch of names
![]()
- paginate_by: determines the maximum number of records to return on any page.
- paginate_orphans: number of items to add to the last page; this helps keep pages with singletons (or some other small number
- paginator_class: class that defines several of the attributes above. Don’t mess with this unless you have an actual reason to do so. Also … you’re not a special snowflake, there are literal dragons in down this road. Go back!
Diagram
A visual representation of how ListView is derived can be seen here:
Conclusion
The ListView CBV is a powerful and highly customizable tool that allows you to display the data from a single model quite easily.
CBV - RedirectView
From Classy Class Based View the RedirectView will
Provide a redirect on any GET request.
It is an extension of View and has 5 attributes:
- http_method_names (from
View) - pattern_name: The name of the URL pattern to redirect to. 1 This will be used if no
urlis used. - permanent: a flag to determine if the redirect is permanent or not. If set to
True, then the HTTP Status Code 301 is returned. If set toFalsethe 302 is returned - query_string: If
Truethen it will pass along the query string from the RedirectView. If it’sFalseit won’t. If this is set toTrueand neitherpattern\_namenorurlare set then nothing will be passed to theRedirectView - url: Where the Redirect should point. It will take precedence over the patter_name so you should only
urlorpattern\_namebut not both. This will need to be an absolute url, not a relative one, otherwise you may get a 404 error
The example below will give a 301 status code:
class myRedirectView(RedirectView):
    pattern_name = 'rango:template_view'
    permanent = True
    query_string = True
While this would be a 302 status code:
class myRedirectView(RedirectView):
    pattern_name = 'rango:template_view'
    permanent = False
    query_string = True
Methods
The method get\_redirect\_url allows you to perform actions when the redirect is called. From the Django Docs the example given is increasing a counter on an Article Read value.
Diagram
A visual representation of how RedirectView derives from View 2

Conclusion
In general, given the power of the url mapping in Django I’m not sure why you would need to use a the Redirect View. From Real Python they concur, stating:
As you can see, the class-based approach does not provide any obvious benefit while adding some hidden complexity. That raises the question: when should you use RedirectView?
If you want to add a redirect directly in your urls.py, using RedirectView makes sense. But if you find yourself overwriting getredirecturl, a function-based view might be easier to understand and more flexible for future enhancements.
Page 3 / 4